
さくらVPSでWordPressを構築した際にSSL証明書を発行、及び適用する際に苦労したのでメモ
以下root権限で実行する
環境
サーバー: さくらVPS (2GB)
OS: CentOS7
WordPress: 5.9.3
SSL: Let's Encrypt
Python: 3.7.13
前提
DNSにドメインを設定済
mod_sslの導入
#モジュールを確認
$httpd -M
#mod_sslが含まれていなければインストール
$yum install mod_ssl
certbotによる証明書取得
certbotで証明書を取得する
#Python3系のcertbotが存在するのでインストール
$pip install certbot

#パスの確認
$which certbot

#certbotによる証明書の発行
#pyenvで入れると/root/.pyenv/shims/certbotがパスなので直接指定して実行
$/root/.pyenv/shims/certbot certonly --apache

#初回はいろいろ聞かれるが言われるがままに実行する

Enter email address (used for urgent renewal and security notices)
 (Enter 'c' to cancel): メールアドレス

- - - - - - - - - - - - - - - - - - - - - - - - - - - - - - - - - - - - - - - -
Please read the Terms of Service at
https://letsencrypt.org/documents/LE-SA-v1.2-November-15-2017.pdf. You must
agree in order to register with the ACME server. Do you agree?
- - - - - - - - - - - - - - - - - - - - - - - - - - - - - - - - - - - - - - - -
(Y)es/(N)o: Y

- - - - - - - - - - - - - - - - - - - - - - - - - - - - - - - - - - - - - - - -
Would you be willing, once your first certificate is successfully issued, to
share your email address with the Electronic Frontier Foundation, a founding
partner of the Let's Encrypt project and the non-profit organization that
develops Certbot? We'd like to send you email about our work encrypting the web,
EFF news, campaigns, and ways to support digital freedom.
- - - - - - - - - - - - - - - - - - - - - - - - - - - - - - - - - - - - - - - -
(Y)es/(N)o: Y

Which names would you like to activate HTTPS for?
- - - - - - - - - - - - - - - - - - - - - - - - - - - - - - - - - - - - - - - -
1: yu00sasaki.com
- - - - - - - - - - - - - - - - - - - - - - - - - - - - - - - - - - - - - - - -
Select the appropriate numbers separated by commas and/or spaces, or leave input
blank to select all options shown (Enter 'c' to cancel): 1
Requesting a certificate for yu00sasaki.com

Successfully received certificate.
Certificate is saved at: /etc/letsencrypt/live/yu00sasaki.com/fullchain.pem
Key is saved at:         /etc/letsencrypt/live/yu00sasaki.com/privkey.pem
This certificate expires on 2022-08-20.
These files will be updated when the certificate renews.

NEXT STEPS:
- The certificate will need to be renewed before it expires. Certbot can automatically renew the certificate in the background, but you may need to take steps to enable that functionality. See https://certbot.org/renewal-setup for instructions.

- - - - - - - - - - - - - - - - - - - - - - - - - - - - - - - - - - - - - - - -
If you like Certbot, please consider supporting our work by:
 * Donating to ISRG / Let's Encrypt:   https://letsencrypt.org/donate
 * Donating to EFF:                    https://eff.org/donate-le
- - - - - - - - - - - - - - - - - - - - - - - - - - - - - - - - - - - - - - - -
証明書が発行されたらしいので実体を確認しておく
archiveに証明書が配置され、最新のものがliveにシンボリックリンクが貼られるらしい
$ls /etc/letsencrypt
accounts  archive  csr  keys  live  options-ssl-apache.conf  renewal  renewal-hooks
#archiveに証明書が配置され、最新のものがliveにシンボリックリンクが貼られるらしい
$ls -alh /etc/letsencrypt/archive/yu00sasaki.com/
total 68K
drwxr-xr-x 2 root root 4.0K May 22 21:11 .
drwx------ 3 root root 4.0K May 22 20:41 ..
-rw-r--r-- 1 root root 1.8K May 22 20:41 cert1.pem
-rw-r--r-- 1 root root 1.8K May 22 20:55 cert2.pem
-rw-r--r-- 1 root root 1.8K May 22 21:11 cert3.pem
-rw-r--r-- 1 root root 3.7K May 22 20:41 chain1.pem
-rw-r--r-- 1 root root 3.7K May 22 20:55 chain2.pem
-rw-r--r-- 1 root root 3.7K May 22 21:11 chain3.pem
-rw-r--r-- 1 root root 5.5K May 22 20:41 fullchain1.pem
-rw-r--r-- 1 root root 5.5K May 22 20:55 fullchain2.pem
-rw-r--r-- 1 root root 5.5K May 22 21:11 fullchain3.pem
-rw------- 1 root root 1.7K May 22 20:41 privkey1.pem
-rw------- 1 root root 1.7K May 22 20:55 privkey2.pem
-rw------- 1 root root 1.7K May 22 21:11 privkey3.pem

$ls -alh /etc/letsencrypt/live/yu00sasaki.com/
total 12K
drwxr-xr-x 2 root root 4.0K May 22 21:11 .
drwx------ 3 root root 4.0K May 22 20:41 ..
lrwxrwxrwx 1 root root   38 May 22 21:11 cert.pem -> ../../archive/yu00sasaki.com/cert3.pem
lrwxrwxrwx 1 root root   39 May 22 21:11 chain.pem -> ../../archive/yu00sasaki.com/chain3.pem
lrwxrwxrwx 1 root root   43 May 22 21:11 fullchain.pem -> ../../archive/yu00sasaki.com/fullchain3.pem
lrwxrwxrwx 1 root root   41 May 22 21:11 privkey.pem -> ../../archive/yu00sasaki.com/privkey3.pem
-rw-r--r-- 1 root root  692 May 22 20:41 README
証明書を紐付け
mod_sslをインストールすると、/etc/httpd/conf.d/ssl.confが生成されるので編集する
$vi /etc/httpd/conf.d/ssl.conf

#before
SSLCertificateFile /etc/pki/tls/certs/localhost.crt
SSLCertificateChainFile /etc/pki/tls/certs/server-chain.crt
SSLCertificateKeyFile /etc/pki/tls/private/localhost.key

#after (先ほどの/etc/letsencrypt/liveと紐づける)
SSLCertificateFile /etc/letsencrypt/live/yu00sasaki.com/cert.pem
SSLCertificateChainFile /etc/letsencrypt/live/yu00sasaki.com/chain.pem
SSLCertificateKeyFile /etc/letsencrypt/live/yu00sasaki.com/privkey.pem
httpdのsslファイルも更新する
$vi /etc/httpd/conf/httpd-le-ssl.conf

#先ほどの/etc/letsencrypt/liveと紐づける
<IfModule mod_ssl.c>
  <VirtualHost *:443>
    DocumentRoot /var/www/html
    ServerName yu00sasaki.com
    SSLCertificateFile /etc/letsencrypt/live/yu00sasaki.com/cert.pem
    SSLCertificateChainFile /etc/letsencrypt/live/yu00sasaki.com/chain.pem
    SSLCertificateKeyFile /etc/letsencrypt/live/yu00sasaki.com/privkey.pem
    Include /etc/letsencrypt/options-ssl-apache.conf
   </VirtualHost>
 </IfModule>
全て編集したらhttpdを再起動する
$systemctl restart httpdReally Simple SSLの導入
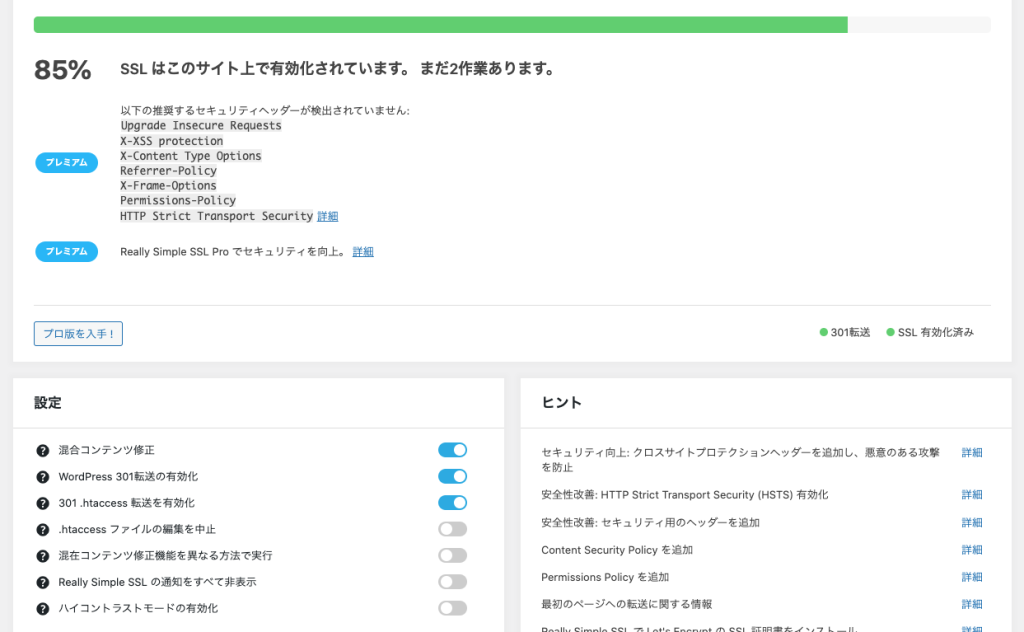
おそらく何も設定していないとhttpsでアクセス時にcssやjsがロードされず、変な挙動になると思います。httpのurlをテンプレートとしていたためです。
手動で対応するのも面倒Really Simple SSLというPluginを使いました。
WordPressでインストールしたらボタンポチで設定できると思います
有料版の案内が出てきますが気にせず以下まで設定できれば完了
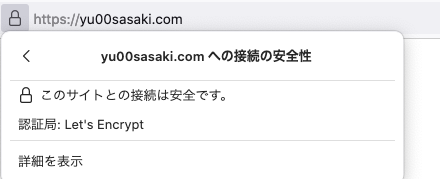
トップページをhttpsでアクセスしてみると、Let’s Encryptによる認証が確認できました
最後にcrontabで定期更新設定。月1での更新でもよさそうだが、1日1回起動に設定する
必要に応じてPATHも追加する
$crontab -e
#crontabに以下を記入
PATH=/root/.pyenv/shims:/root/.pyenv/bin:/usr/local/sbin:/usr/local/bin:/sbin:/bin:/usr/sbin:/usr/bin:/root/bin
0 3 * * * certbot renew --post-hook "systemctl restart httpd"

コメント